This example is based on a configuration by Mr. Tomaschko from the company ces in Passau (https://www.ces-passau.de/).
It was about sending print jobs as e-mails or alternatively printing them out, controlled by outputs in the document.
The SwithMail tool is used as the e-mail programme. It enables access data to be saved in a configuration file and edited via GUI.
The following steps are necessary to test the example
- Install PrintMulti as described in the manual and a PrintMulti printer named „PrintMulti EMail“
- Download the following archive "ExampleMail.zip", copy it to the "PrintMulti\Examples" program files directory and unzip it. The files should then end up in a subdirectory "PrintMulti\Examples\ExampleMail". The tool "SwithMail" in the current version is in another subdirectory.
- In the "ExampleMail" folder you will find a file "UseExampleMailConfiguration.reg". Execute it. It controls that printouts to the printer "PrintMulti EMail" use the configuration file "ExampleMail.ini" in the directory.
- The printer "TestPrinter" is used for physical printing. You may have to adjust this.
- Start the "SwithMail" programme; select "Configure Settings with GUI" and open the "SwithMailSettings.xml" in the "ExampleMail" folder.
You must definitely adjust the mail server, username and password. You can also test the configuration from there. - Open the "DummyAddresses.xlsx" and configure the email column in all rows where "SendMail=1" is defined with a valid destination address. This is currently "mail@pleasefill.de". In case of an invalid address, a corresponding entry should be found in the SwithMail log file (e.g. at gotthard.dobmeier@ultramail.none).
All data are generically generated random data. - Now open the "TestMail.docx" and agree to the link with the Excel document or connect it if necessary.
- The mail merge printout would unfortunately create a single print job with all documents. The example SPLViewer: Split form letter into individual print jobs when printing describes how you can get around this.
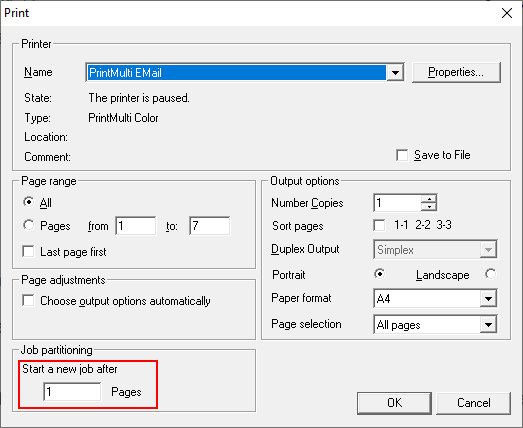
Here very briefly: Stop the "PrintMulti EMail" printer; print the serial letter on the "PrintMulti EMail"; download SPLViewer if necessary and start it as administrator; select a print job division of 1 (bottom left) when printing and output it again on the "PrintMulti EMail". Delete the original job with the 7 pages and continue printing.
Before doing this, you should perhaps print a single document in Word for testing.
Here are a few more impressions and explanations
Below is an extract from the Excel file "DummyAddresses.xlsx"

The red fields should contain correct email addresses. The 4th line intentionally contains a wrong email to examine the SwithMail log file.
The fourth record in the linked mail merge document TestMail.docx would then look like this:
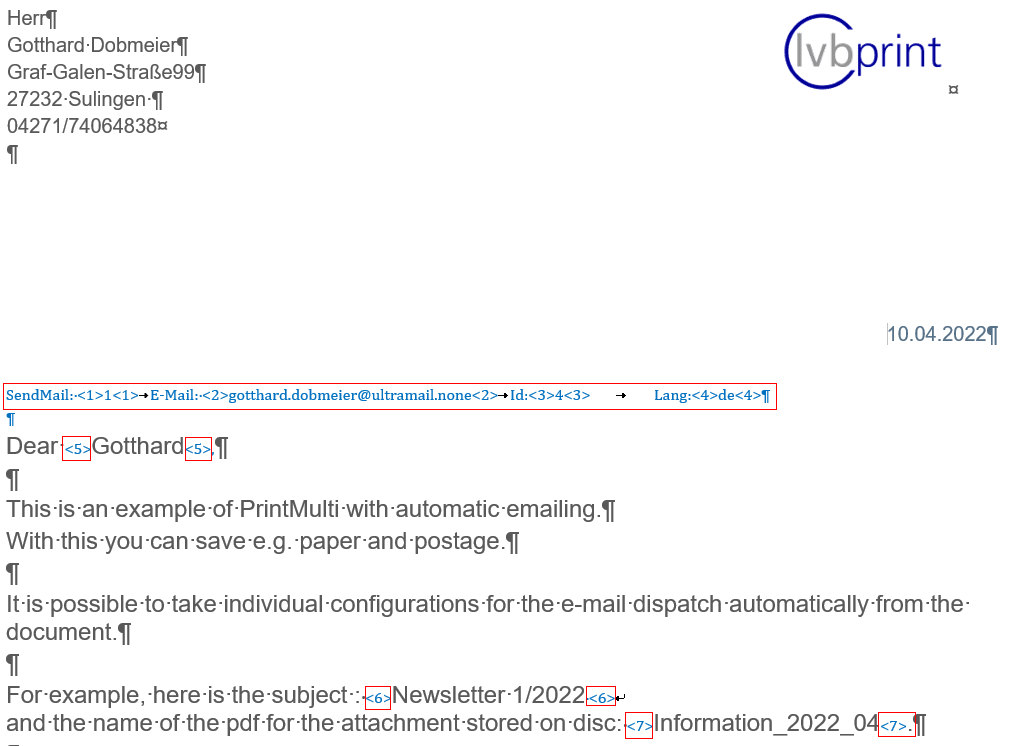
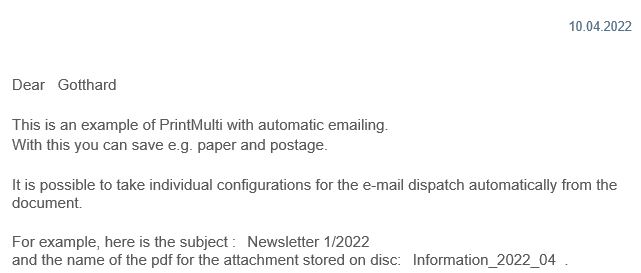
The blue text passages are formatted with the "Hidden" style. If you set the colour there to "white" and reduce the font, the passages are no longer visible. This was done in the document "TestMailHidden.docx".
Then the print preview looks like this, for example:
The main parts of the configuration file
[SendMail]
Active=1
Execute=yes
; if not executed as user, log files are owned by system account
ExecuteAsUser=yes
ExecuteTimeout=INF
; dependent on the language a body text file is chosen using SwithMail parameter replacement options
ExecuteCmd=@“%PM_INSTALLPATH%\Examples\ExampleMail\SwithMail\SwithMail.exe“ /s /x @“%PM_INSTALLPATH%\Examples\ExampleMail\SwithMailSettings.xml“ /p1 @“%@FirstName%“ /to %@Receiver% /bodytxt @“%PM_INSTALLPATH%\Examples\ExampleMail\Body_%@Lang%.txt“ /subject @“%@Subject%“ /attachment @“%@PDFFile%“ /Log @“%@MailLogFile%“
[CreatePDFAndMail]
Printer=Microsoft Print To PDF
; Extract data from the document
!@Receiver=$(1;rawpage;“<2>(.*)<2>“;1;regex)
!@Id=$(1;rawpage;“<3>(.*)<3>“;1;regex)
!@Lang=$(1;rawpage;“<4>(.*)<4>“;1;regex)
!@FirstName=$(1;rawpage;“<5>(.*)<5>“;1;regex)
!@Subject=$(1;rawpage;“<6>(.*)<6>“;1;regex)
!@attachmentname=$(1;rawpage;“<7>(.*)<7>“;1;regex)
!@PDFFile=%allusersProfile%\PrintMulti\#(%Y_%m_%d)T\%@attachmentname%_%@id%.pdf
!@MailLogFile=%allusersProfile%\PrintMulti\#(%Y_%m_%d)T\LogMail.txt
Save2File=%@PDFFile%
ExecuteSectionMail=SendMail;%@SendMail%
[PrintDocument]
Printer=TestPrinter
; Virtual Printer – need PrintMulti as Print Processor
[PrintMulti EMail]
Active=1
!@SendMail=$(1;rawpage;“<1>(.*)<1>“;1;regex;1;==)
!@Print=$(%@SendMail%;1;!=)
; action is not called if calucalted to false
ActionCreatePDF=Print;CreatePDFAndMail;%@SendMail%
ActionPostversand=Print;PrintDocument;%@Print%
- Variables that begin with "!" are set as environment variables and retain their validity in all subsections. As with all environment variables, access takes place by enclosing them in "%" expressions. The "@" is part of the name.
When using @"...", the inverted commas remain and escape sequences are not replaced (see chapter 6.1 in the manual). - The regular expression e.g. at "@SendMail" returns the text between ".... " and compares it with "1". The result is a boolean value that is stored as "1" or "0". "@Print" then becomes NOT "@SendMail" and only one of the two actions is executed.
- In the action "CreatePDFAndMail", the job is output to the Microsoft PDF Printer and saved in @PDFFile. The name of the PDF file is composed of a fixed path, a date directory and parts of the document. After saving the PDF, the section "SendMail" is executed. All environment variables retain their value.
- In the section, SwithMail is then called with a long command line. The following are interesting here:
- Transfer of a parameter (/p1) which SwithMail then replaces in the body text.
- The body text is selected on the basis of the language
- The name of the log file is transferred here. This did not work in the SwithMail configuration - for whatever reason.
The SwithMail log file then contains e.g.
10.04.2022 12:00:42 - Success - SendTo: "xxx" - CC: "" - BCC: "" - Subject: "Newsletter 1/2022 " - Attachments: "Information_2022_04_2.pdf"
10.04.2022 12:00:45 - Failure - SendTo: "gotthard.dobmeier@ultramail.none" - CC: "" - BCC: "" - Subject: "Newsletter 1/2022 " - Attachments: "Information_2022_04_4.pdf" - Postfach nicht verfügbar. Die Serverantwort war: Requested action not taken: mailbox unavailable
10.04.2022 12:00:49 - Success - SendTo: "xxx" - CC: "" - BCC: "" - Subject: "Newsletter 1/2022 " - Attachments: "Information_2022_04_7.pdf"
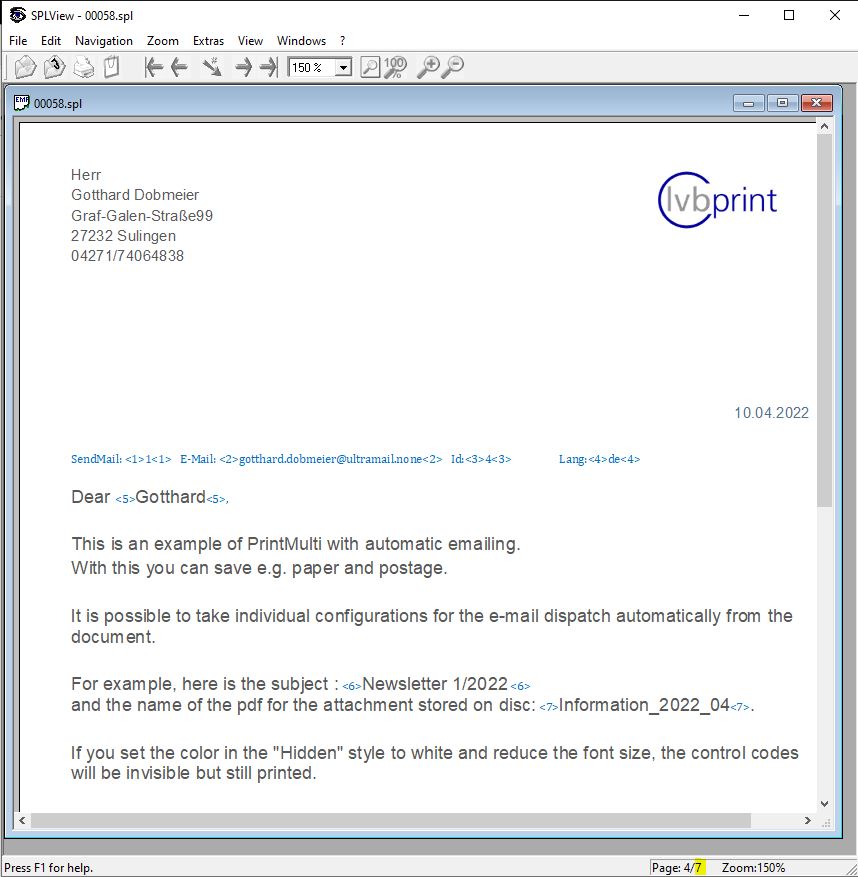
Next, more can now print the mail merge letter on the "PrintMulti EMail". Stop the printer and print all documents. Then open the SPLViewer as administrator. You should then see a print job with 7 pages. The 4th of 7 pages looks like this, for example, if the text is not "hidden".
Then print the document again from the SPLViewer to the "PrintMulti EMail" and select a new job after each page (this does not seem to work in the job view; you have to open the document).
You can now delete the original job with 7 pages and continue with the "PrintMulti EMail" printer.

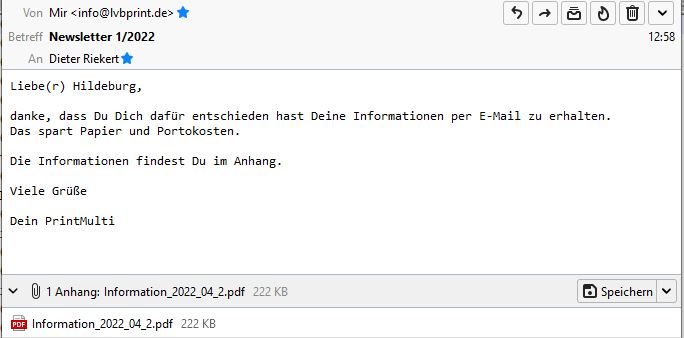
The result for the mail recipient could then look like this:
In my case, the "test printer" is a local file printer where the jobs are retained (just as with the "PrintMulti EMail").
This looks like this in the SPLViewer, for example. The printed documents are clearly visible. The rest were sent by e-mail.

This example uses the powerful tool: SwithMail.


