Introduction
A common use of PrintMulti is automatic PDF creation during printing. This article shows how to configure PrintMulti so that this is easily possible. It assumes that the printer currently in use can be used.
The requirements for this are already described in the article "Printing copies with PrintMulti", so we will start here with the configuration of a suitable PDF printer.
Selecting a PDF printer
It is best to choose a printer driver that "prints" directly to a PDF file and not a two-stage driver such as the "PDF Creator" and many others that technically use a Postscript driver and later convert the resulting Postscript file to PDF, often with the help of "Ghostscript". This also works with PrintMulti, as described in the manual in chapter 8, but is not trivial to configure.
In this article, we will therefore limit ourselves to PDF printers that generate a PDF directly without any detours.
The easiest way is to use the "Microsoft Print To PDF" printer supplied with Windows. You may have to activate it in the "Windows Features" so that it appears. This does its job without any problems, but does not have many setting options.
Another free PDF printer is included with "PDF Architect", even in the free version. This offers many setting options such as PDF/A, margins, font embedding, encryption and much more. With the help of saved printer settings and the "Devmode1" option, you can also use different settings. You can find examples of this in the article "Printing copies with PrintMulti" or in the manual.
There are certainly still a number of PDF printers that fulfil the requirements. If you already have one in use, simply try it out and see whether the PDF file you receive is actually PDF or Postscript.
Simple example for PDF creation
Install the "Microsoft Print To PDF" or the "PDF Architect" or both and copy the lower section into the PrintMulti.ini. You must replace the "Samsung" printer with a suitable printer as described in the other article.
[MicrosoftPrintToPDF]
Printer=Microsoft Print To PDF
Save2File=C:\PDFOutput\#(%Y-%m)T\#(%d)T\#J_#K_MS.pdf
Color=1

[PDFArchitect9]
Printer=PDF Architect 9
Save2File=C:\PDFOutput\#(%Y-%m)T\#(%d)T\#J_#K_Arch.pdf
Devmode1=c:\temp\pdfa.dev
Color=1

[Samsung]
Active=1
PrintSelf=1
ActionPDF9=Print;PDFArchitect9
ActionPDFMS=Print;MicrosoftPrintToPDF
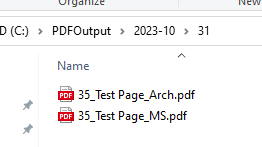
If you now output a test page to the Samsung printer, a subdirectory with the year and month and another with the current day should be created in the directory "C:\PDFOutput" and the PDF files in it.

The "Microsoft Print To PDF" driver offers hardly any setting options, but the "PDF Architect" does. With the help of the "Devmode2File" tool, printer settings can be configured and saved in a file (here "C:\temp\pdfa.dev"). This enables, for example, PDF/A generation, encryption or whatever else the driver offers. The advantage of saved device modes is that it still works identically, even if someone tinkers with the printer settings. Apart from that, there are several places for saved device modes in the registry and you can never be sure which one is used, especially if different users and impersonations are in use, as is the case with a print processor.
"#K", "#J", "#T" are macros that contain defined values. In some cases, formatting is possible as with "#T". "#K" is the document name with the replacement of characters that are invalid for file names.
Watermarks in the PDF with PrintMulti options
A watermark or background image should now be added to the PDF. This can be done using the options built into PrintMulti, such as the output of text, images, rectangles and lines, or with the help of powerful tools such as "pdftk", which can be called using the ExecuteCmd options of PrintMulti.
PrintMulti outputs multiple texts with the following settings. This also works with the PDFArchitect printer with the corresponding settings.
[WatermarkDocumentCenter]
Active=1
Type=Text
Text=#D
Attrib=BI
Font=Arial
Foreground=0
Color=0xFF2600
X=$(#w;2;/)
; unit is twips. (1 inch = 1440 Twips; 1 inch = 2.54cm; 1cm=567 Twips)
Y=$(#h;567;-)
Height=5mm
Align=Center
VertAlign=Center

[WatermarkDate]
Type=Text
Text="#(%Y-%m-%d %H:%M)T"
Attrib=BI
Font=Courier New
Foreground=0
Color=0xE0E0E0
X=$(#w;2;/)
Y=$(#h;2;/)
Height=20mm
Align=Center
VertAlign=Center
dx=#w
dy=#h

[WatermarkSideRight]
Active=1
Type=Text
Text="#n/#Z "
Font=Courier New
Foreground=0
Color=0xFF2600
X=$(#w;#t;-)
Y=$(#h;567;-)
Height=5mm
Align=Right
VertAlign=Center

[MicrosoftPrintToPDF]
Printer=Microsoft Print To PDF
Save2File=C:\PDFOutput\#(%Y-%m)T\#(%d)T\#J_#K_MS.pdf
ObjectBottomRight=WatermarkSideRight
ObjectBottomCenter=WatermarkDocumentCenter
ObjectCenter=WatermarkDate
Transparent=1
Color=1
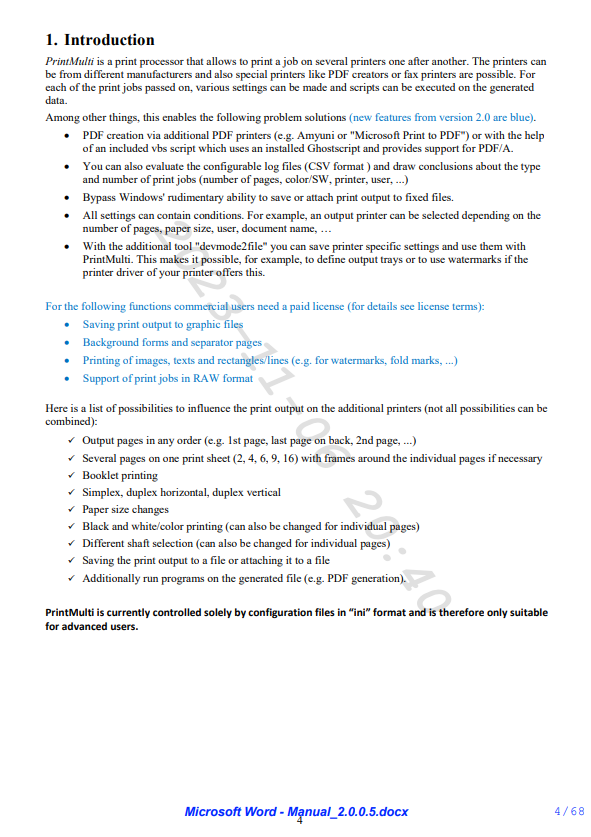
A printed extract from the PrintMulti manual would then look like this:

The advantage of the PrintMulti method is that dynamic objects such as the date, the document name, the current page and lots of other information can be easily inserted.
Using pdftk to modify the generated PDF
There are command line programmes for editing PDF files. The best known is probably "pdftk". This can also be used to insert background images or watermarks. However, it does not seem to be able to change the current PDF, so you have to work with intermediate files.
A PrintMulti configuration with the use of "pdftk" could look like this:
[ExecuteMove]
Order=5
Execute=yes
ExecuteAsUser=true
ExecuteFlags=0x08000000
ExecuteTimeout=INF
ExecuteCmd=cmd /c move @"#G" %tempFile%

[ExecutePDFtk]
Order=5
Execute=yes
ExecuteAsUser=true
ExecuteFlags=0x08000000
ExecuteTimeout=INF
ExecuteCmd=c:\tools\pdftk %tempFile% background %background% output @"#G"

[ExecuteDelete]
Order=5
Execute=yes
ExecuteAsUser=true
ExecuteFlags=0x08000000
ExecuteTimeout=INF
ExecuteCmd=cmd /c del %tempFile%

[pdftk]
!tempFile=@"C:\PDFOutput\temp_#J.pdf"
!background=@"c:\temp\background.pdf"

Printer=PDF Architect 9
Save2File=C:\PDFOutput\#(%Y-%m)T\#(%d)T\#J_#K_9_pdftk.pdf
Devmode1=c:\temp\pdfa.dev
Color=1
ExecuteSection1=ExecuteMove
ExecuteSection2=Executepdftk
ExecuteSection3=ExecuteDelete
Transparent=1

[Samsung]
Active=1
PrintSelf=1
ActionPDFTK=Print;pdftk
There are no variables in the strict sense in PrintMulti. The two assignments that begin with "!" are set as environment variables and are retained across section boundaries. As usual in Windows, they can be accessed with "%...%".
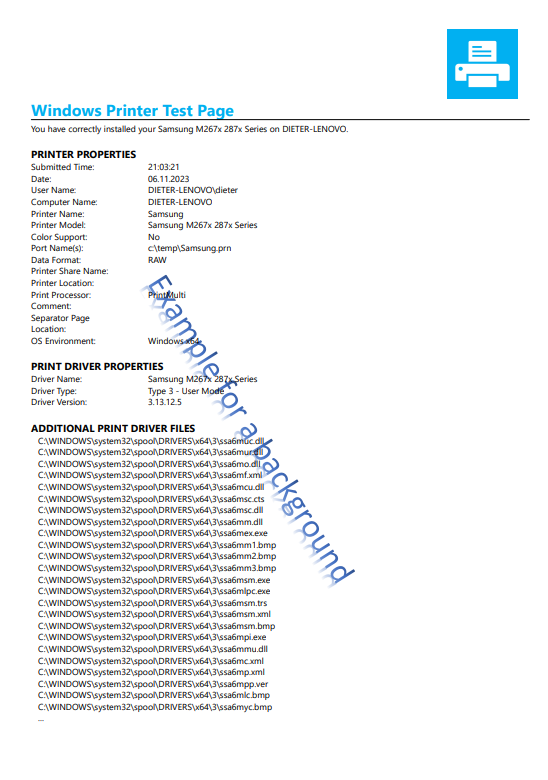
The background was quickly created with WinWord and saved as a PDF in "C:\temp\background.pdf".
You can see the result of a test page here:

