Introduction "Printing Copies with PrintMulti"
In the days of dot matrix printers, printing copies/copies was easily achieved by using special paper. With the advent of laser printers, this possibility disappeared.
One of the main uses of PrintMulti is to reprint the job often from a different paper tray with coloured paper or a watermark.
This option can partially replace the printing of carbon copies and copies. At present it is not possible to file copies from another tray in the same form as carbon copies, as this is a separate print job that is subsequently executed.
Many printer drivers already offer the possibility to integrate watermarks.
PrintMulti can use this option or also contribute self-defined objects such as texts, lines/rectangles or images.
With PrintMulti it is relatively easy to influence the appearance of copies/copies whether they come from the same printer from the same tray, from a different tray or even from a different printer altogether.
This article should help to get a currently used printer driver to output copies from another tray with a watermark with the help of PrintMulti. This should then work with almost all applications.
Choosing a suitable printer driver
Of course, it is easiest if the driver used can also be used for carbon copy printing. For this it is necessary that it spools in EMF format.
You can find out the spool format with the free SPLViewer.
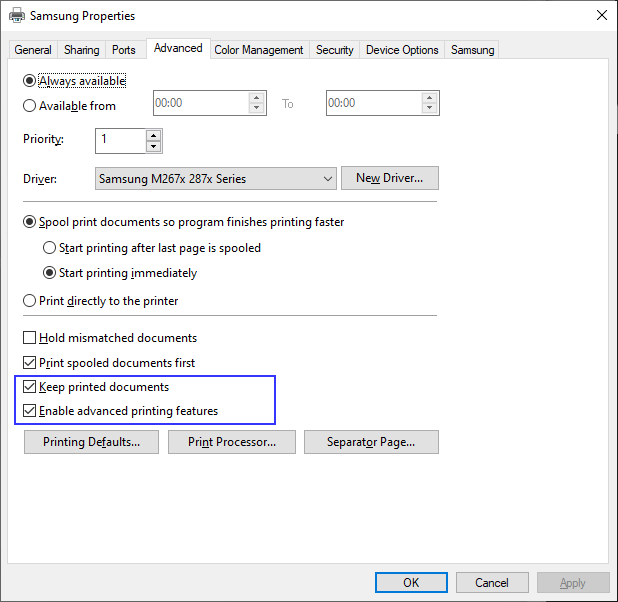
To do this, make sure that in the advanced settings the options „Druckaufträge nach dem Drucken nicht löschen“ und „Erweiterte Druckfeatures aktiveren“ ausgewählt sind.
In the examples we use a printer named „Samsung“. You must replace this with the name of the printer you are using.
Now print a test page (if you want to save paper, you can also stop the printer).
After downloading the SPLViewer from here and unzipping the zip file, you will receive a single executable file. To access the spool file, you must start SPLViewer as an administrator. It is crucial that something from "NT EMF" appears on the test page (you get the list with the second toolbar button "J" from the left).
In this case you can also view the print job graphically.
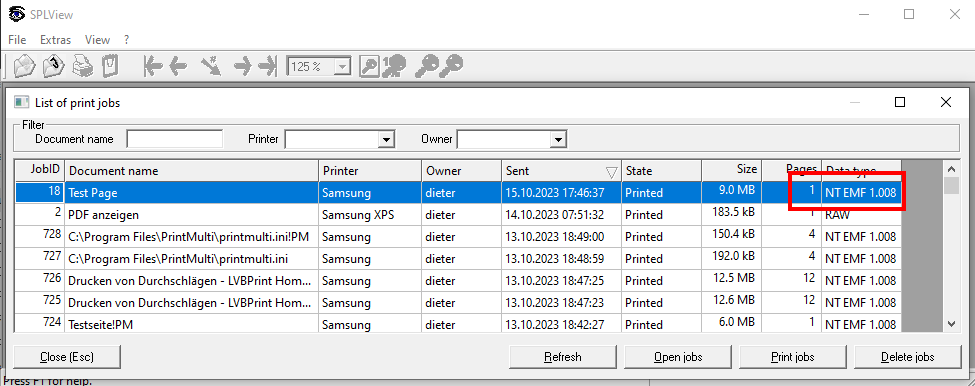
If instead it says "RAW", as in the case of test pages printed earlier, check whether the printer driver offers a setting for the spool format.
Here are two examples from different drivers. However, it is also possible that there is no setting for this.
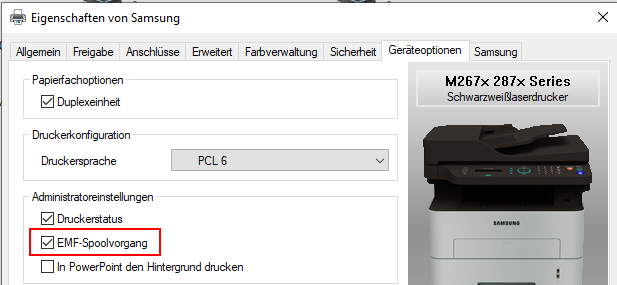
EMF on a Samsung driver
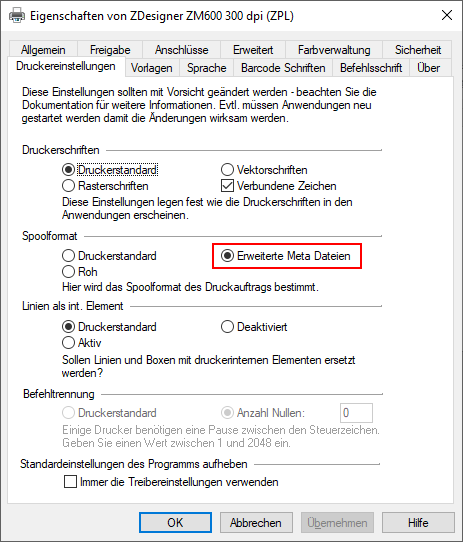
and with a label printer from Zebra
If you do not manage to output the job in EMF format, you can still try to find an alternative driver for the printer you are using.
To do this, add the printer manually and then select "Windows Update".
The drivers then offered are usually older version 3 drivers that came with Windows (version 4 drivers are current).
If you do not find what you are looking for here either, you would have to use a virtual printer, but this is not part of this article.
Activate PrintMulti
Next, in the advanced printer settings, select "PrintMulti" as the print processor and on the right side "NT EMF", preferably in the highest version. This setting seems to have no direct influence, but it certainly can't hurt to select EMF here (best to note the old print processor or work on a copy of the printer).
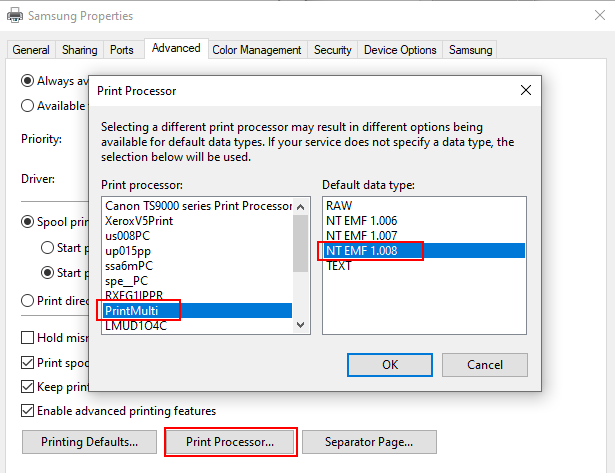
If something other than "winprint" was selected here, you may be missing some setting options such as "several pages per print page" or watermarks. This is the case with Canon drivers, for example.
If you need these options, you can use the appropriate PrintMulti settings or use a second identical printer for physical printing without PrintMulti.
After this change, your printer will not print anything until you have adjusted the "PrintMulti.ini". This is located in "C:\Program Files\PrintMulti" and must normally be edited as an administrator.
Insert the following lines after the "[COMMON]" section and select the name of your printer instead of "Samsung"
[Samsung]
Active=1
PrintSelf=1
Now the printer should work normally again. There should also be log files in the "%ALLUSERSPROFILE%\PrintMulti\Log" directory.
Print copies
We now simply want to print an additional copy from another tray. To print a copy from the manual tray on the Samsung printer, add a few lines to PrintMulti.ini
[Samsung_Manuell]
Printer=Samsung
PaperSource1=4

[Samsung]
Active=1
PrintSelf=1
ActionCopy=Print;Samsung_Manuell
A few remarks on this:
- You can add several actions. These always start with "Action" and must differ in the text afterwards. In the print action, the name refers to the name of a section.
- There are several settings for the paper source. With "PaperSource1" you select one for the first and all subsequent pages.
You can enter a code or the name of the tray here
("PaperSource1=Manual feed" would also have been possible).
You can have this output with the supplied tool "ShowPrinterInformation" (The use of a code is recommended in any case, if the Windows language should change).
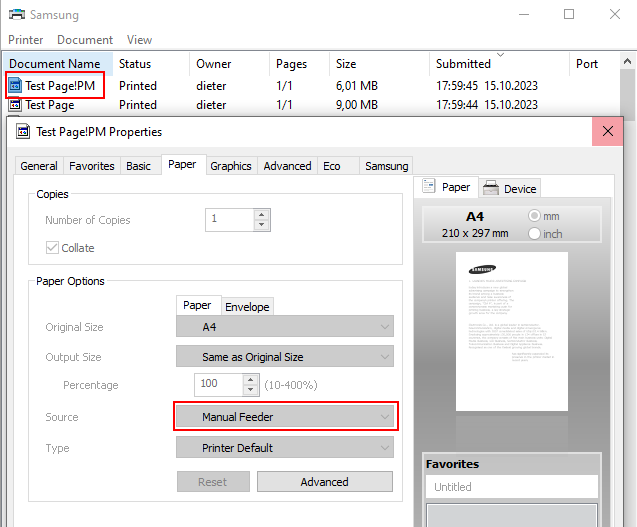
If a PaperSource setting is found, then all possible trays are also logged in the log file "DbgLog.csv". - If the print jobs are preserved, you can also control the selected settings when selecting the job in the print queue (the "!PM" in the document name is automatically appended by PrintMulti to detect a recursion; "Samsung" is a PrintMulti printer after all).
Here is an excerpt from the output with "ShowPrinterInformation".
Bin names and codes: [DC_BINNAMES][DC_BINS]
                   :       7 Auto Select
                   :       4 Manual Feeder
                   :       1 Tray 1
And the display of the properties of the second print job
Adding a Watermark with the Printer Driver
Many printer drivers offer the possibility to configure watermarks. In PrintMulti you can use this option by saving printer settings to a file with the supplied tool "Devmode2File" and referring to it when printing.
This is also a way to configure output trays. Windows, unlike input trays, does not provide a programmatic interface for output trays. You can of course create different printers with different settings as a workaround, but using saved settings is certainly more convenient.
In Devmode2File you create a new file, select the printer and configure everything you want. Some settings are overwritten by PrintMulti. These are marked accordingly. In the example, a watermark "Top Secret" is defined and saved in the file "C:\temp\TopSecret.dev".
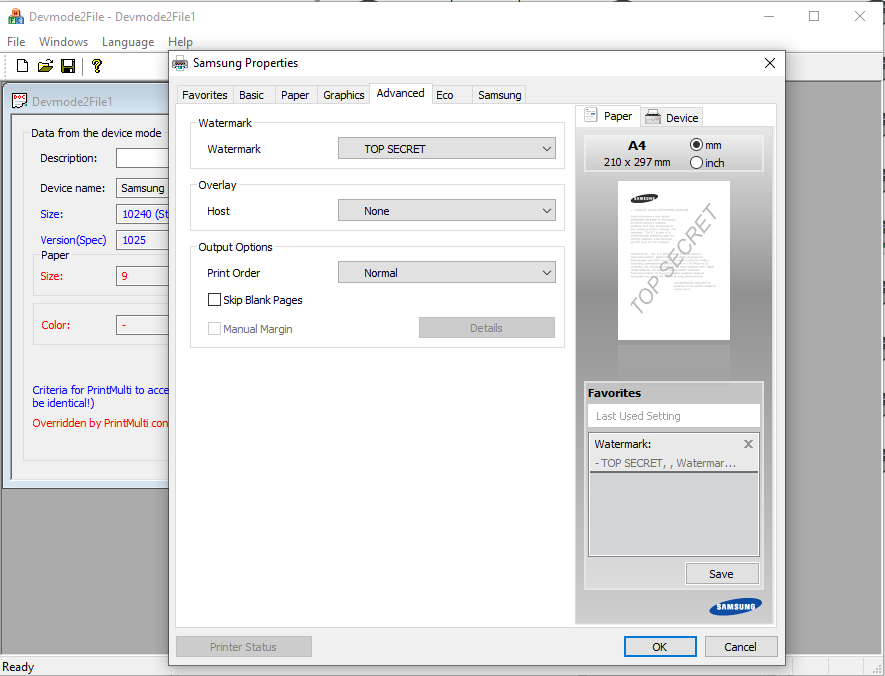
A line with "Devmode1=" is then inserted into PrintMulti.ini.
[Samsung_Manuell]
Printer=Samsung
PaperSource1=4
Devmode1=c:\temp\topsecret.dev
You cannot normally see the output in SPLViewer, as the driver provides it later, but you should be able to see the setting in the print job properties.
Add watermark with PrintMulti
As described in the Manual on page 50, you can also add watermarks with flexible content.
Here is an example:
(text across with date / name of print job censored / current page and number of pages right-aligned)
[WatermarkDate]
Type=Text
Text="#(%Y-%m-%d %H:%M)T"
Attrib=BI
Font=Courier New
Foreground=0
Color=0xE0E0E0
X=$(#w;2;/)
Y=$(#h;2;/)
Height=20mm
Align=Center
VertAlign=Center
dx=#w
dy=#h

[WatermarkDocumentCenter]
Type=Text
Text=#D
Attrib=BI
Font=Arial
Foreground=0
Color=0xFF2600
X=$(#w;2;/)
; unit is twips. (1 inch = 1440 Twips; 1 inch = 2.54cm; 1cm=567 Twips)
Y=$(#h;567;-)
Height=5mm
Align=Center
VertAlign=Center

[WatermarkSideRight]
Type=Text
Text="#n/#Z "
Font=Courier New
Foreground=0
Color=0xFF2600
X=$(#w;#t;-)
Y=$(#h;567;-)
Height=5mm
Align=Right
VertAlign=Center

[Samsung_Manuell]
Printer=Samsung
PaperSource1=4
ObjectSecret=WatermarkDate
ObjectDocumentCentere=WatermarkDocumentCenter
ObjectSideRight=WatermarkSideRight
Transparent=1
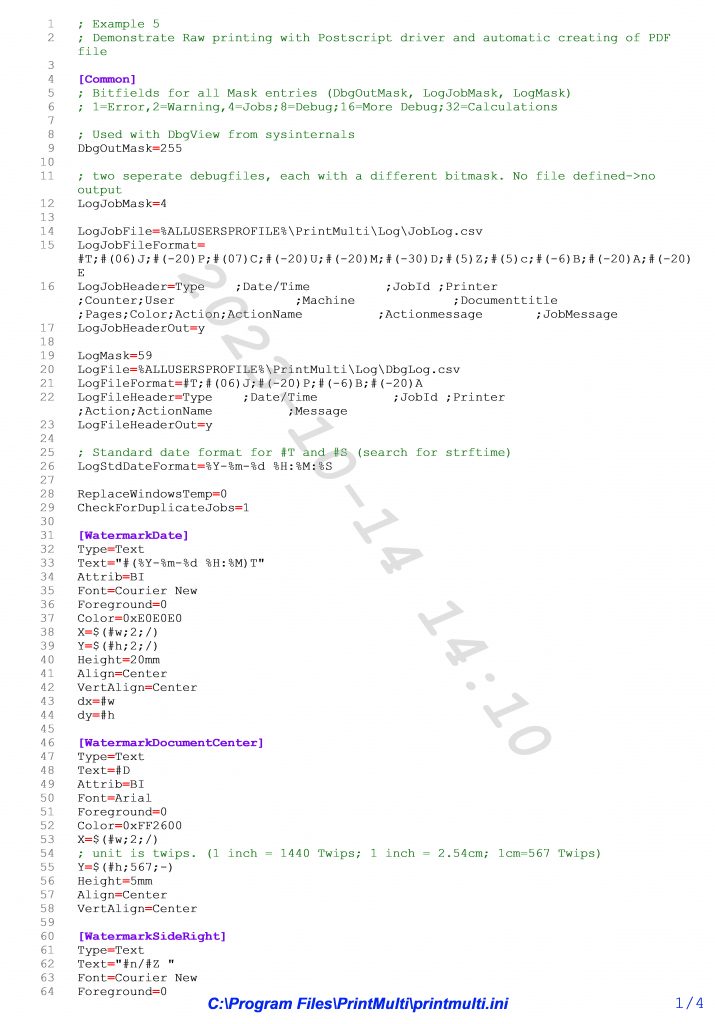
The lower part of the expression then looks like this in the SPLViewer, for example
Other useful settings
The following problems have also already been solved, which have to do with copies:
- Always print the copy in black and white
Color=0
The printout is calculated per page and can then also take on different values per page (e.g. "Color=$(#n;1;==)" first page coloured; the rest B/W - Always print copy in duplex
Duplex=V - Restrict page range (e.g. omit last page with small print)
LastPage=$(#Z;1;-)
#Z is the total number of pages


